
-
Getting Started
-
FAQs
-
Money Central
Setting Up Your Store To Sell Products
In addition to having different listings to offer services, classes or events, your Style Lynk subscription includes a virtual Store, allowing you to sell products from your listing pages or Store page! Just 1 more way Style Lynk helps you to build your brand, reach more potential customers, and make more money!
The Store is completely optional and is already a built in feature on your dashboard. Follow the directions below to create your store and make it visible on your listing page(s).
Now let's get on to setting up Your Store!
Store Dashboard
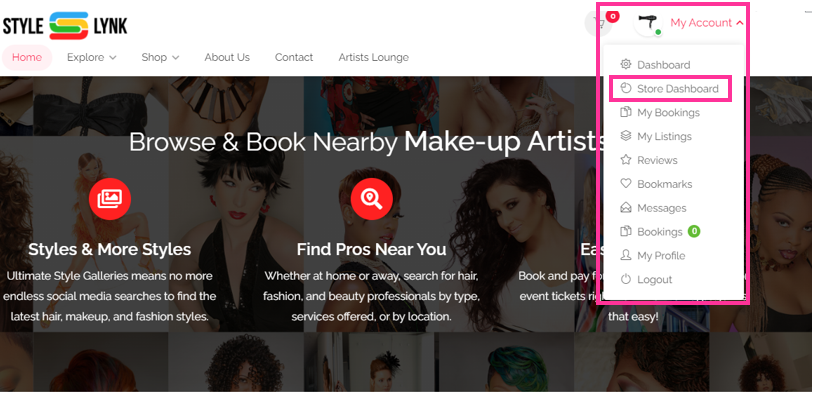
You can access your Store dashboard 2 ways:
- Click on the user dropdown menu located at the top right hand of the screen and select “Store dashboard”. OR
- From the main dashboard, scroll down to the “Store” section, and select “Dashboard”.
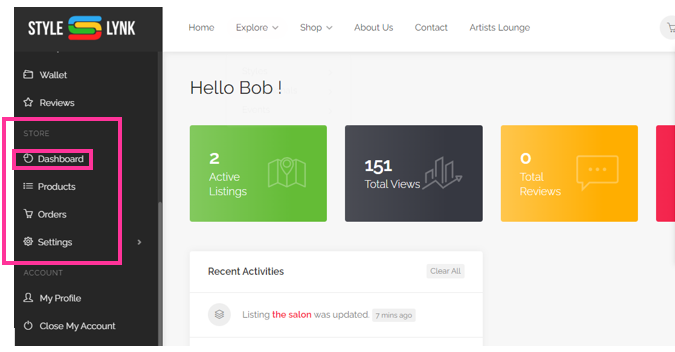
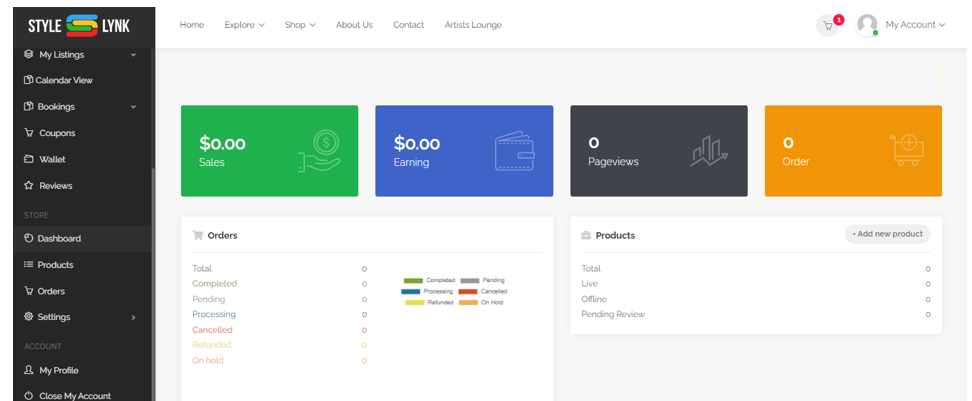
Your Store dashboard shows your Store details at a glance, like total sales, Store page views, and order statuses.
Setting Up Your Store
From the “Store” menu, select the “Setting” tab. You will see the Store settings page. This page is pretty straightforward. Here, you will add all of your Store’s information, such as, Store name, address, hours of operation, as well as adding images for your a profile picture and Store banner.
Adding Products
To add products:
- From the “Store” menu on the left, click on the “Products” tab, then click “Add Products“.
- Enter the product name and price, and upload a product image. If the product is on sale, enter the sale price in the “Discounted price” field. Click “Schedule” to enter the start date and end date for the sale.
- Shipping costs: ***at this time, there is not an option to add a separate line amount for shipping. If your product has a shipping cost, we suggest that you determine the avegrage shipping rate for that item and include the cost for shipping in the total price of the product.****
- Enter a short product description to appear by the product thumbnail.
- Select the product category and search for any “tags” that may apply to your product that will help customers find your products.
- Enter the full product description.
- At this point, your product is 100% visible for customers to purchase. To finish, select “Create” or Create and New”:
- “Create“: Click this option to add more specific product information, such as whether it is a downloadable or virtual product, sku numbers, stock status, and any additional information customers should see at time of purchase. You can also select whether or not the product is “visible” or “hidden” in your Store. OR
- “Create and New”: If no other information needs to be added, you can click this option to finish this product and move on to add your next product.
Did you know...
You can turn features on and off when you edit your listing pages, but the Store widget will not be visible on your listing page until after you set up your Store. Once you set up your Store, the Store widget will appear on your listings edit page for you to turn off or on.
Adding Your Store To A Listing
After creating your Store, on the Dashboard menu on the left, select the listing that you want the store widget to appear on.
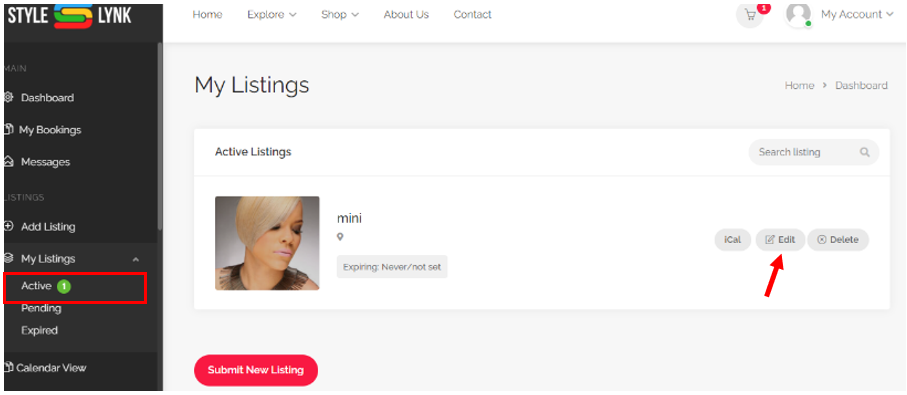
Scroll to the bottom of the settings. The Store widget should now appear on your edit listing page. You can enable the store by sliding the button to the right.
Click in the space and start typing / select the products that you would like to appear on that listing page.

You can also feature up to 4 products on your listing page(s). Click in the space that says “Select some of your products…” and start typing to select the products that you would like to appear on that listing page. Once you have finished, click, “preview”, then “Submit” your listing. Select “Edit” if you need to make changes.
Repeat this process to add your Store to any other professional or Event listing.
Note: While you can have unlimited listing, you can only have 1 Store that will be linked to all of your listings.
Overview:
Processing & Fulfilling Your Orders
Important notes about Your Store:
Just as with the services featured on your Professional, Class, or event listings, you understand that you are 100% responsible for fulfilling orders from your Store, which means that YOU:
- must provide the products or services customers purchase from your Store page
- are 100% responsible for providing shipping, delivery, pick up, or download instructions so that customers who purchase your products via your Style Lynk Store page receive the items purchased
- are 100% responsible for handling customer exchanges and refunds
Let’s go over a few important steps to help you stay on top on your order processing.
Order Notification
As the Store owner, you will receive an email notification for every order of your products. You will receive a “no-reply” message from the system instantly after an order is received.
Order List
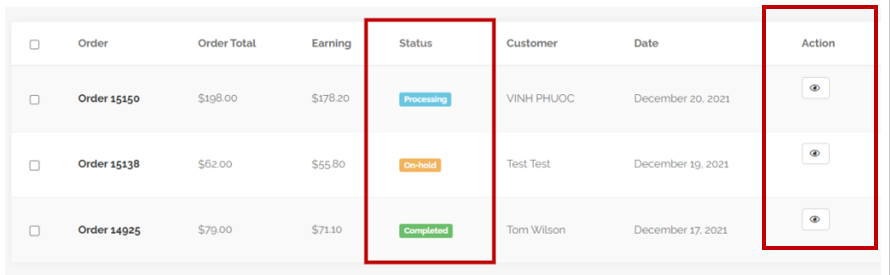
The Order List view displays the order details in the list. This page shows order number, order total amount, earned amount, order status, customer details, order date and order action. you could view order farther details manage order status and delete order from order action. You can filter the orders by date. You can also export the order list.
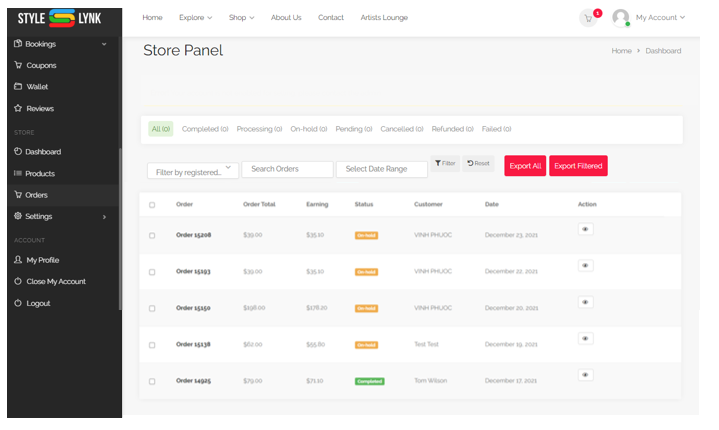
Updating Order Status
When a product is purchased, you are responsible for updating the status of your orders. You can view and update the order status from the order listing. Click on the “view” icon in the “Action” column to update the status:
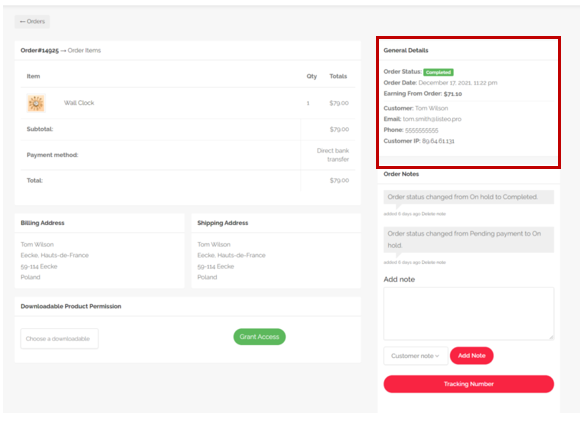
Order Details
When you select the order, you will be able to view the order status, order date, earning amount from a specific order, customer id, email, phone number, as well as products ordered.
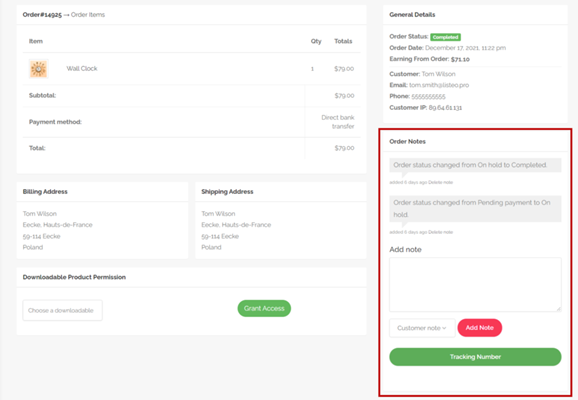
Adding Order Notes
When you select the order, you can also add a note and set the note for the customer or set the not as “private” if it is an internal note that is only to be view by you / your staff. If the note is marked for the customer, the customer will get an e-mail notification for every note added. For the private note, only the Store owner will get the e-mail notification.
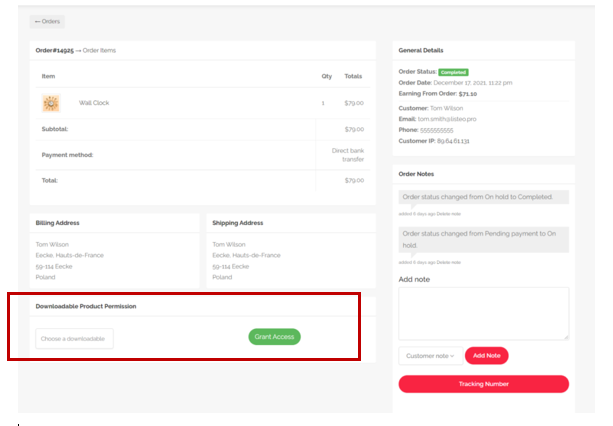
Download Permissions
When you select the order, you can also can manage permissions and access for downloadable products. You can add or delete download files and control access to download the file.
Updating Shipment Tracking Details
Lastly, when you select the order, you can track the shipment of the product that you are selling. Navigate to your Seller Dashboard → Orders → Click on the order you want to add shipment tracking. At the bottom of the Order, you will find a button titled ‘Tracking Number’. You can provide shipping provider name or URL, Tracking number and Date shipped. After providing the information, click on the “Add Tracking Details” button.
The order details will be updated and a new order note will be added containing the tracking details.