-
Getting Started
-
FAQs
-
Money Central
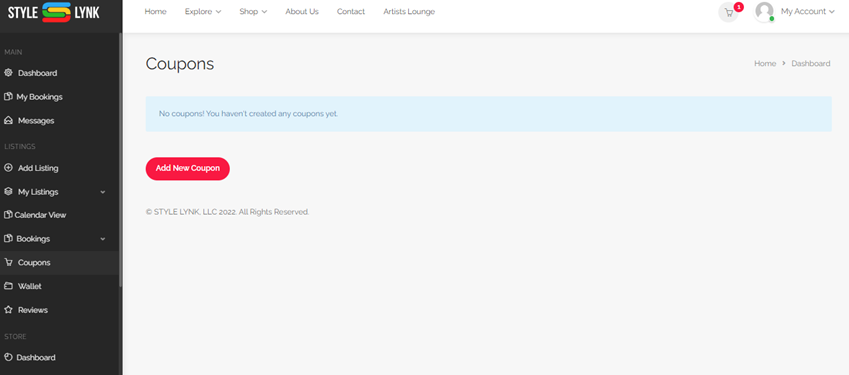
Creating Coupons
From there, you will be able to add /edit the following information about your coupon:
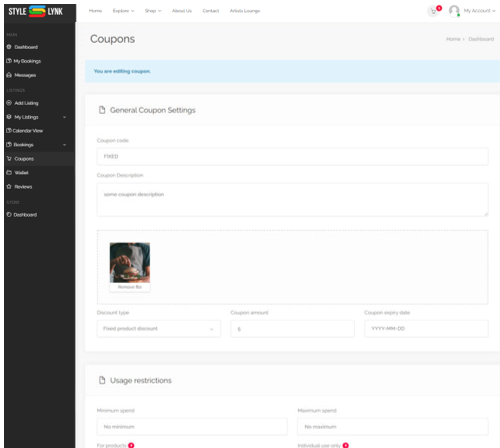
General Coupon Settings
- Coupon code– enter the code you want customers to enter at checkout to get the discount / special
- Coupon description: enter details of the special
- Coupon background image (optional) – upload the image you would like to appear as the background for your coupon. If you choose not to add an image, the background will be a solid gray.
- Discount type and amount: select whether the coupon is for a percentage amount or a fixed dollar amount from the dropdown bar. Then enter the percentage or fixed dollar amount in the “Coupon Amount” field.
- Expiration date: select the date you would like the coupon to expire
Usage Restrictions
Setting minimum and maximum spend limits is a great way to offer tiered specials. You can create a different coupon for different spend limits (ex. Save $10 on services between $10-50, Get 15% off products over $99)
- Minimum spend: must the customer spend a certain amount in order to use this coupon? In no minimum, leave at 0.
- Maximum spend: is there a maximum spend amount? (ex. applies on orders up to $99)
- For products: start typing in this space to select which listings or products the coupon applies to. Leave blank if applies to all services, classes/events, and products.
- Individual use only: select if cannot be combined with other specials
Usage Limits
Set the limits for the coupon:
- Limit per coupon: leave as unlimited if there is no limit for how many times this coupon can be used (ex. if only available for the first 50 people who book with you / purchase a product, set to 50.)
- Limit per user: how many times can each customer use this coupon? (ex. If only 1 user per customer, set to 1.)
- Allowed emails: does this coupon only apply to specific customers? If it is a “private” coupon and you don’t want to make it available for all customers, enter the email addresses for those specific customers here.
You did it! The coupon is created and will automatically expire on the expiration date. Repeat this process to create additional coupons.
Editing The Coupon
After creating the coupon, just return to the “Coupon” tab on you dashboard to edit it or create additional coupons.
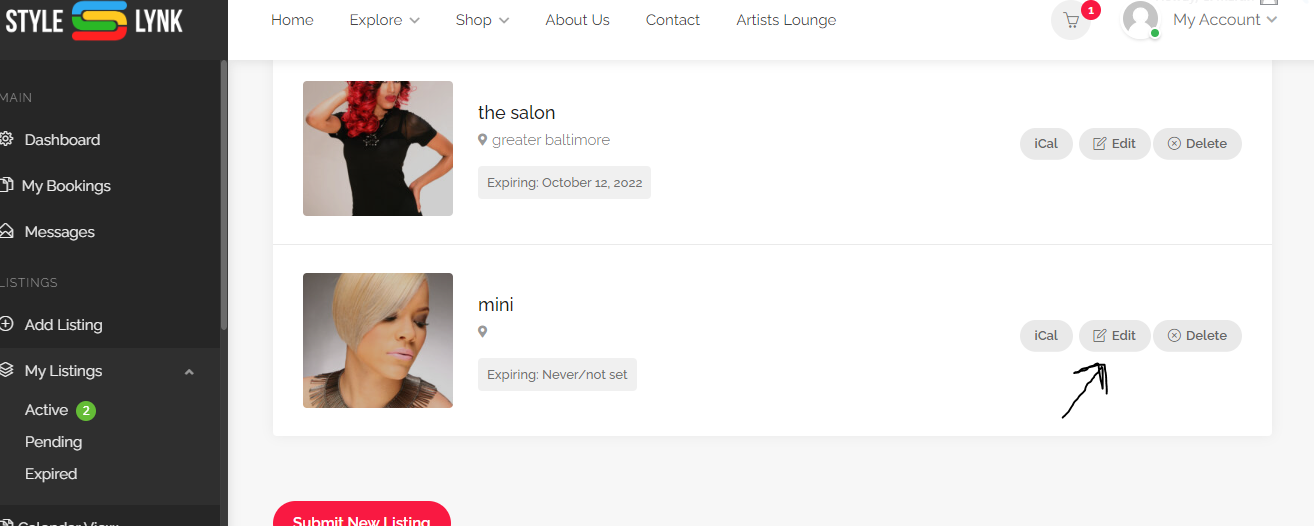
Displaying the Coupon
After the coupon is created, go to the “My Listings” tab on your Dashboard and select the listing that you want the coupon widget to appear on. Select “edit”.
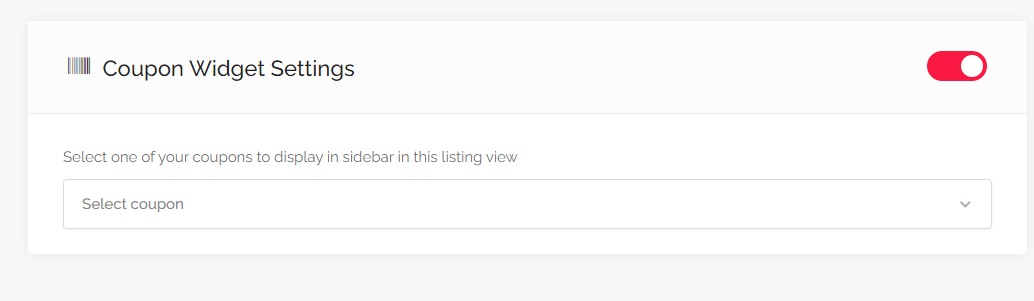
- Scroll to the section of the listing that says “Coupon Widget Settings”.
- Slide the button to the right to enable the widget.
- Click in the space that says “select coupon” to select the coupon you want to apply for that listing.
- Select “Preview” to review your changes. If you are happy with your changes, select “Submit Listing”. If you need to change the coupon or make any other edits, select “Edit Listing”.
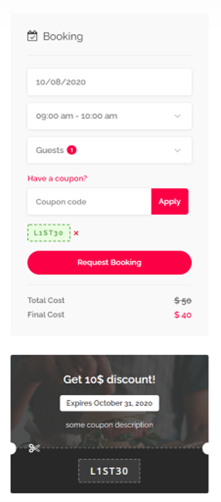
All done! Your coupon will now display on your listing until it expires. Repeat these last steps to apply a coupon to any other listings you may have. Note: only 1 coupon can be displayed on a listing at a time.
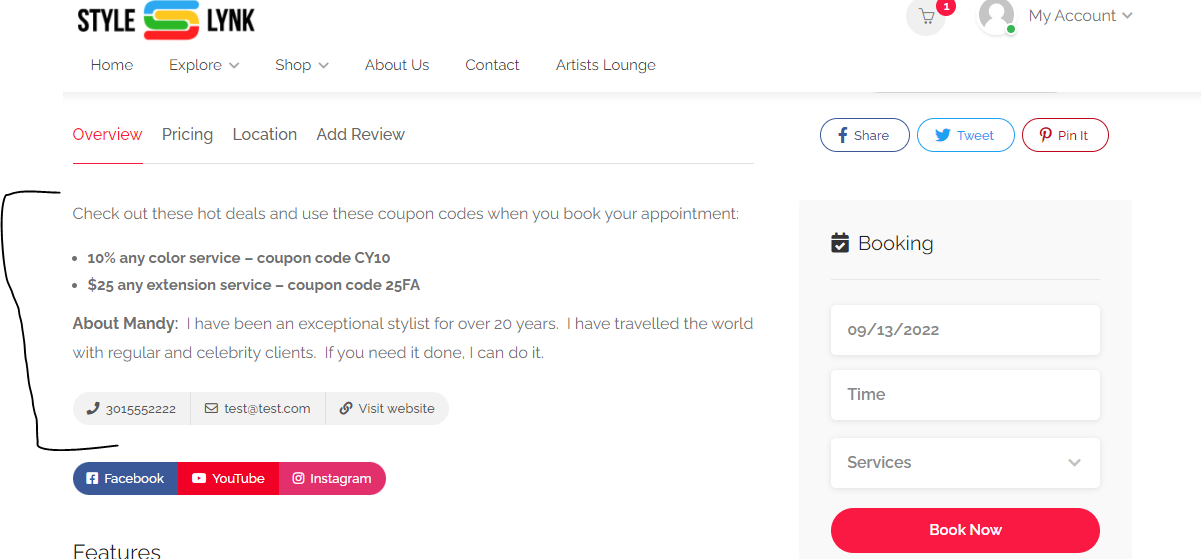
Tip For Displaying Multiple Coupons
You can only display 1 coupon in the coupon widget at a time. If you have multiple coupons and would like for your customers to know about them, select the best deal as the coupon widget and include the additional coupons & coupon codes in the “about Your Business” / Overview area on your listing page.