-
Getting Started
-
FAQs
-
Money Central
Adding A Professional Listing
With your Style Lynk subscription,
you are able to add unlimited listings from these 3 categories:
Types of listings:
- Professional: main listing type to show your services and allow clients to book appointments
- Classes & Events: a secondary listing type where you can offer classes or events and allow customers to register for classes / book tickets for events
- Styles: use this listing type to submit your best work to be featured in the Style Lynk Main Styles Galleries.
Now that we know the different listing types,
this article is going to walk you through setting up a PROFESSIONAL listing.
Important notes about Professional Listings:
- Services are paid in full at the time of booking.
- You are responsible for fulfilling the services that are booked from your listing
- Be sure to indicate your refund policy on your listing.
- In the event of service issues or customer disputes, you are responsible for processing any refunds that may be required. (*Style Lynk services fees are not refundable.)
With that understood, let’s go to the dashboard and add a Professional listing.
Accessing Your Dashboard
To access your dashboard to add or edit your listing, you can click on the user dropdown menu from the top right side of the screen or from the “My Listings” section of your Dashboard.

Getting started
In the first section, you’ll enter the basics:
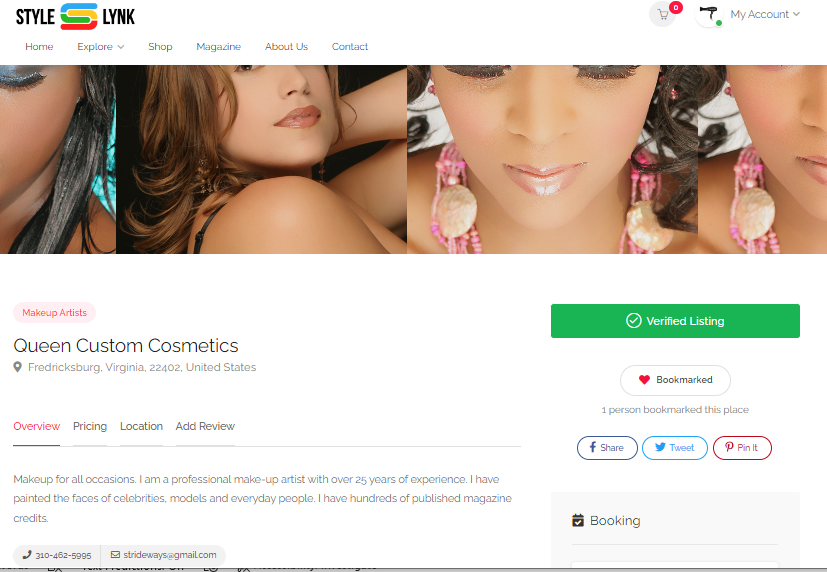
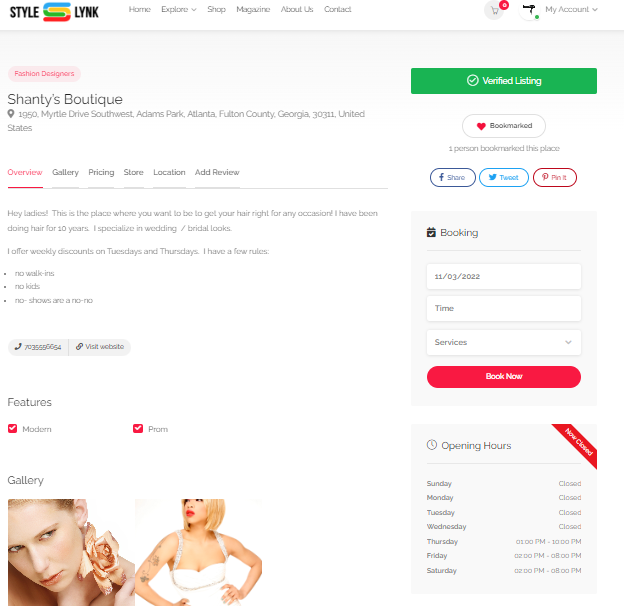
- Listing name: enter the name you want for your Professional listing. The name can be your personal name, salon or shop name, your business name, etc.
- Description: a great space to share “About Me”, a description of your services, or even mention current promotions
- Service category: are you a barber, hair stylist, make-up artist, fashion stylist, or fashion designer? Choose the one that fits.
- Tip: If you’re a hair stylist and only dab in make-up from time to time, select “Hair Stylist” and add your make-up services offer. But if your a serious multi-tasker, you can create a separate listing for your hair products & services and a separate listing for your make-up appointments.
- Specialties: what are you famous for? What do you specialize in? Select those services here.
- Video: enter the url for a video about your products or services to display here (format https://www.samplesite.com)
- Gallery: click in the box to add the desired images for your listing. In order for the image gallery to display at the top of you listing, you must have at least 4 images. If you have less than 4 images, they will be displayed below the “services” area on the page.
- Business contact information / Social media profiles: enter phone, website, and social handles here.
- Business address: enter your mappable business address here
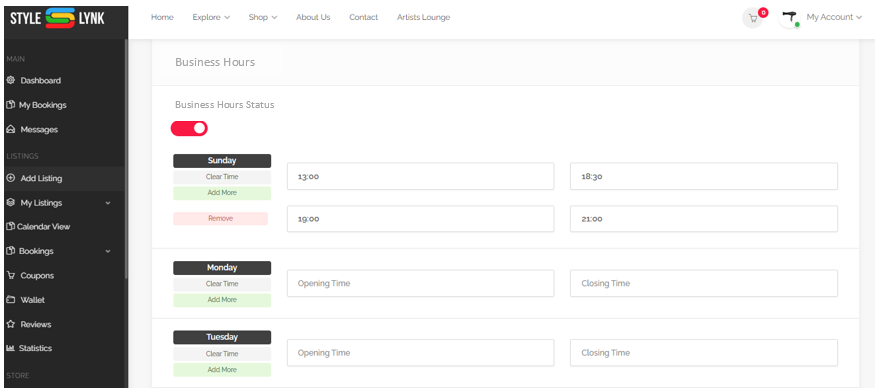
Now, we’ll move on to entering our business hours,
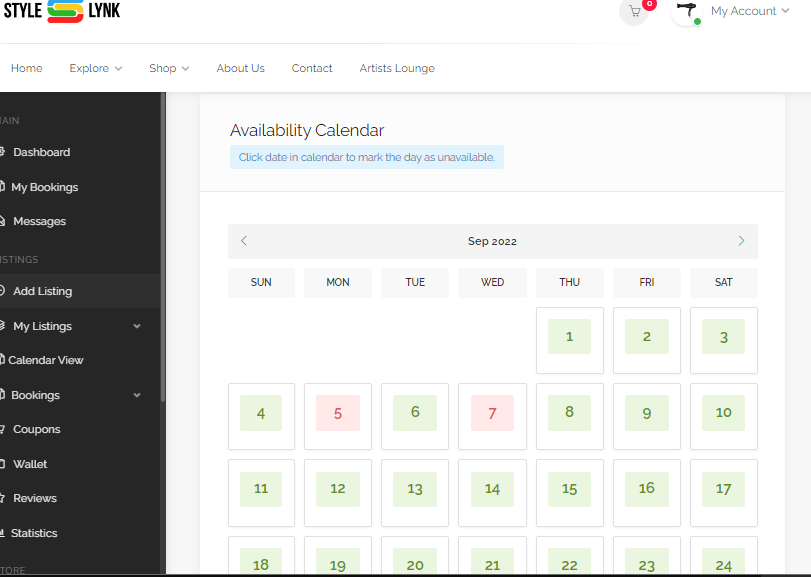
availability, and booking information.
Booking Widget

Turn this slider on if you wan the Booking widget to appear on your listing. Convenient slide on / slide off if you need take off the rest of the day and don’t have time to fiddle with a lot of other settings.
Pricing & Bookable Services
This is where you will list your services. Turn on the main slider for this section to easily make ALL your services appear or be hidden on your listing page. Each item also has a slider that can be turned on or off to make it visible for customers to book.
Now this is VERY important:
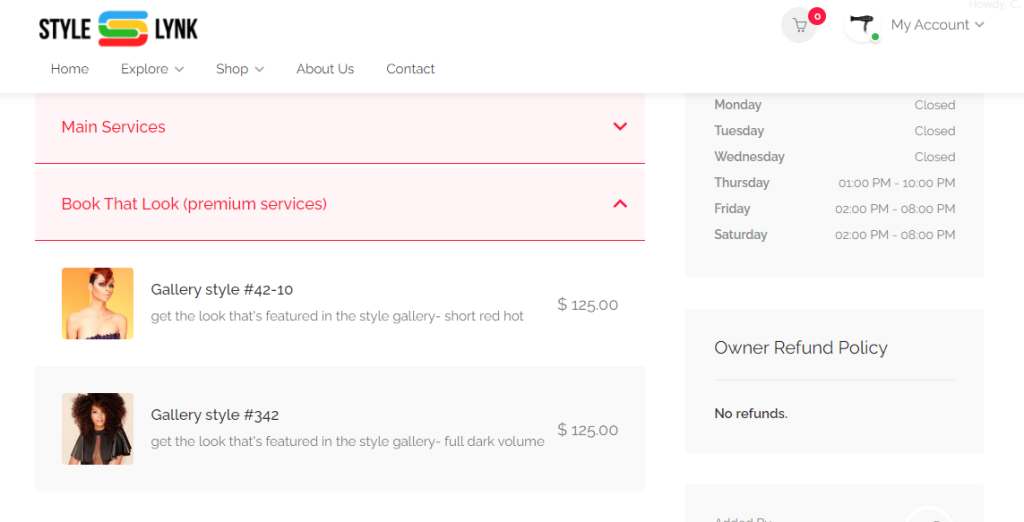
FIRST, create at least one category for your services. (Suggestion: If you only have 1 category, name it “Main Services”). THEN add service items to the category. Categories and service items are moveable / drag n’ drop. If you don’t create a category FIRST, it will throw off the alignment on the page. We know, we’re working on that….
Tip: Help Site Visitors Book That Look
If your styles are selected for Style Lynk Magazine or the Main Styles Galleries, site visitors will be directed to your Professional listing page when they click on your name. So why not create a special category of services in your price list on your Professional listing page so site visitors can book an appointment to get the look from the Magazine or Style Gallery? Just another way Style Lynk helps you to build your brand, reach more potential clients, and make more money! You’re welcome.
Appointment Scheduler: Time Slot vs. Time Picker
When setting up your Appointment Scheduler,
you have 2 options for displaying appointment times:
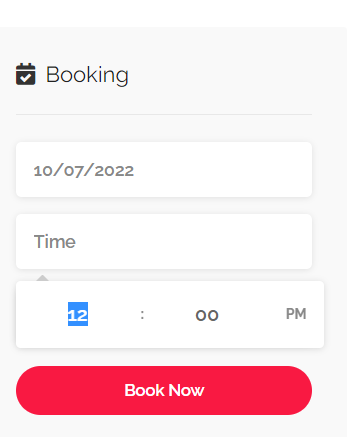
Time Picker: allow clients to manually enter the time they want. This option is best if you want to take every booking time you can get – but makes it possible to overbook.
When clients click on the “time” field, they will be able ot manually enter their desired appointment time in HH:MM format.
This is the default option. Keep the main slider in the “off” position to utilize the “time picker” option. The Appointment Availability section will be grayed out.
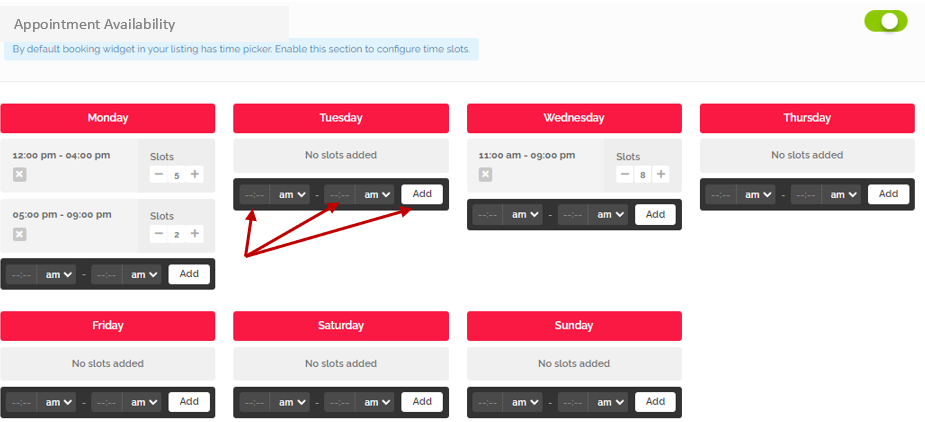
Time Slots: determine how many bookings you will permit between a time frame. Why this option is best:
- if you don’t want to end up booking more people than you can handle in a given time frame
- it allows for a more precise booking schedule because you set a maximum number of appointments you can book during a timeframe / day
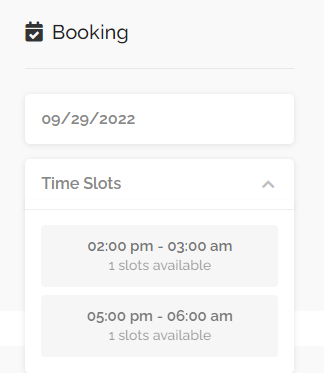
When clients click on the “time” field, the slots for each time window will appear for them to choose from, showing them how many appointments remain for those times. If no slots are available for the day, the time field will show “No slots for this day.”
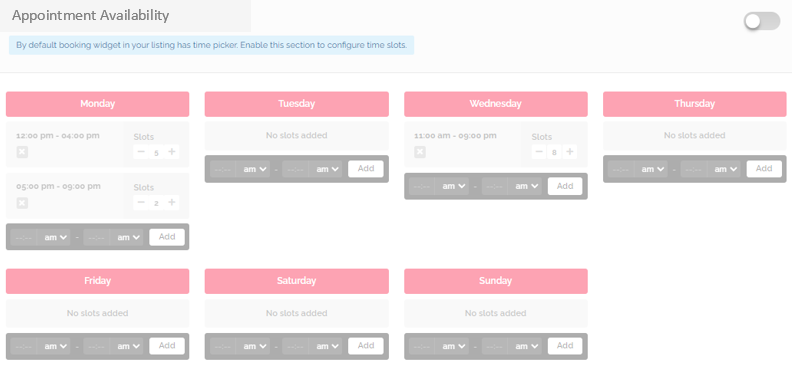
To enable the time picker, move the slider to the “on” position. To create time slots:
- Enter a start time and end time in the time fields, then click “add”.
- Next, enter how many appointments you want to have for that time slot.
Repeat the process to add one time slot or multiple time slots for each day.
Products & Store Widgets
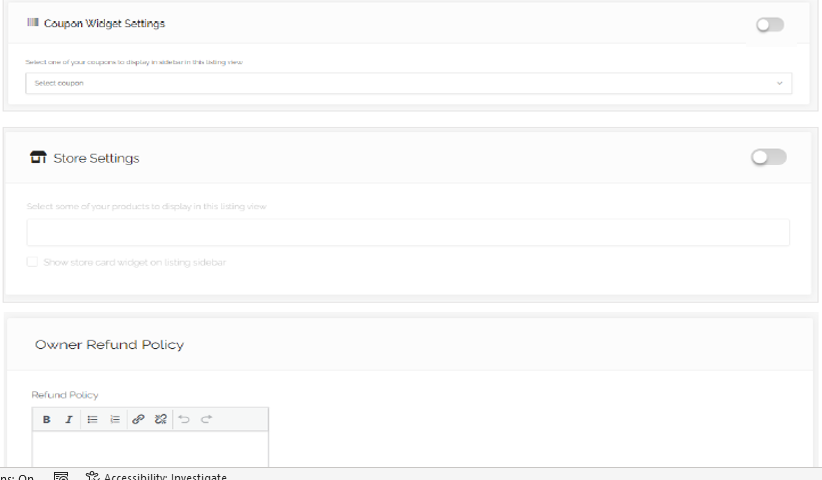
Do you have products to sell? Do you wat to feature them on your listing page? Slide on the switch to make your Store visible on your listing page.
Be sure to visit the Store Set-up page for instructions on how to set up your Store. Visit the Coupons page for details on how to create coupons.
Refund Policy
Do you charge a fee if clients are late? What’s your policy for no-show’s? Use this field to let clients know your policy for being late, last minute cancellations, no-show’s and refunds. *This field is required.
Did you know...
You can turn several features on and off when you edit your listing pages, but:
- the Coupon widget will not appear on your listing page until after you create a coupon. Once you create a coupon, the widget will be visible to add coupons for your products or services.
- the Store widget will not be visible on your listing page until after you set up your Store. Once you set up your Store, the Store widget will appear on your listings edit page for you to turn off or on.

